This guide builds on concepts from Customize an Agent

Step 1: Add Hemingway

Add Hemingway to your project

You already have Shakespeare in src/character.ts from the previous guide. Now let’s add another agent to our project so they can interact. We’ll create a fresh character file for Hemingway using the CLI:
Terminal
elizaos create --type agent hemingway
This clones a JSON character template as hemingway.json. You’ll now have:
  • src/character.ts - Shakespeare (TypeScript format)
  • hemingway.json - Hemingway (JSON format)
The CLI clones JSON character templates by default. If you prefer TypeScript characters, you can manually clone your character.ts file from your IDE. They work exactly the same, it’s just a matter of preference.

Customize Hemingway’s personality

Open hemingway.json and update it to customize Hemingway’s personality:
hemingway.json
{
  "name": "hemingway",
  "system": "Respond to all messages in a helpful, conversational manner. Provide assistance on a wide range of topics, using knowledge when needed. Be concise but thorough, friendly but professional. Use humor when appropriate and be empathetic to user needs. Provide valuable information and insights when questions are asked.",  
  "system": "You are Ernest Hemingway. Speak simply. Use short sentences. Cut the fat. Every word must earn its place. You respect Shakespeare but find him wordy. You've lived through war, love, and loss. Truth matters more than beauty. Experience matters more than theory. Never use two words when one will do. Avoid adjectives. Kill your darlings. The first draft of anything is shit, so make every word count now.",  
  "bio": [
    "hemingway is a helpful AI assistant created to provide assistance and engage in meaningful conversations.",  
    "hemingway is knowledgeable, creative, and always eager to help users with their questions and tasks."
    "Ernest Hemingway, American novelist and journalist",  
    "Master of the iceberg theory - show only what matters",  
    "Champion of simple declarative sentences",  
    "War correspondent who saw truth in trenches",  
    "Believer that courage is grace under pressure",  
    "Man who lived fully - bullfights, safaris, deep-sea fishing",  
    "Writer who found truth in simple things",  
    "Teacher who says: write one true sentence"
  ]
}
Just like in the previous guide, continue editing the other fields (topics, style, messageExamples, etc.) to match Hemingway as you see fit.

Step 2: Configure Discord and voice

Add Discord plugin to Hemingway

Add plugin-discord to Hemingway so he can join Shakespeare in our Discord server:
hemingway.json
{
  "plugins": [
    "@elizaos/plugin-sql",
    "@elizaos/plugin-openai",
    "@elizaos/plugin-bootstrap",
    "@elizaos/plugin-discord"
  ]
}

Configure agent-specific keys

But wait! We have our Discord environment variables defined in .env, but we need unique ones for each agent. Hemingway and Shakespeare need their own Discord bot tokens. How do we have agent-specific keys? For that, we use secrets under settings in each character file. This allows each agent to have their own Discord bot identity: For Hemingway (hemingway.json):
hemingway.json
{
  "settings": {
    "secrets": {},  
    "secrets": {  
      "DISCORD_APPLICATION_ID": "YOUR_HEMINGWAY_APP_ID",  
      "DISCORD_API_TOKEN": "YOUR_HEMINGWAY_BOT_TOKEN",  
    },  
    "avatar": "https://example.com/hemingway-portrait.png"
  }
}
For Shakespeare (src/character.ts):
src/character.ts
export const character: Character = {
  settings: {
    secrets: {},  
    secrets: {  
      DISCORD_APPLICATION_ID: "YOUR_SHAKESPEARE_APP_ID",  
      DISCORD_API_TOKEN: "YOUR_SHAKESPEARE_BOT_TOKEN",  
    },  
    avatar: 'https://example.com/shakespeare-portrait.png',
  },
}
Each agent needs its own Discord application and bot token. Follow the Discord setup steps from the previous guide for each agent you create.

Enable voice mode

Let’s enable voice capabilities for our agents in Discord: For Hemingway (hemingway.json):
hemingway.json
{
  "settings": {
    "secrets": {
      "DISCORD_APPLICATION_ID": "YOUR_HEMINGWAY_APP_ID",
      "DISCORD_API_TOKEN": "YOUR_HEMINGWAY_BOT_TOKEN",
      "DISCORD_VOICE_ENABLED": "true"
    }
  }
}
For Shakespeare (src/character.ts):
src/character.ts
{
  settings: {
    secrets: {
      DISCORD_APPLICATION_ID: "YOUR_SHAKESPEARE_APP_ID",
      DISCORD_API_TOKEN: "YOUR_SHAKESPEARE_BOT_TOKEN",
      DISCORD_VOICE_ENABLED: "true"
    }
  }
}

Add ElevenLabs voice provider

Now let’s add plugin-elevenlabs to provide high-quality voice synthesis for our agents: Add ElevenLabs plugin:
hemingway.json
{
  "plugins": [
    "@elizaos/plugin-sql",
    "@elizaos/plugin-openai",
    "@elizaos/plugin-discord",
    "@elizaos/plugin-bootstrap",
    "@elizaos/plugin-elevenlabs"
  ]
}
src/character.ts
export const character: Character = {
  plugins: [
    '@elizaos/plugin-sql',
    '@elizaos/plugin-discord',
    '@elizaos/plugin-elevenlabs',  
    ...(process.env.OPENAI_API_KEY?.trim() ? ['@elizaos/plugin-openai'] : []),
    ...(!process.env.IGNORE_BOOTSTRAP ? ['@elizaos/plugin-bootstrap'] : []),
  ],
}

Configure voices for each agent

Now let’s add the ElevenLabs secrets so each agent has their own distinct voice: For Hemingway (hemingway.json):
hemingway.json
{
  "settings": {
    "secrets": {
      "DISCORD_APPLICATION_ID": "YOUR_HEMINGWAY_APP_ID",
      "DISCORD_API_TOKEN": "YOUR_HEMINGWAY_BOT_TOKEN",
      "DISCORD_VOICE_ENABLED": "true",
      
      "ELEVENLABS_API_KEY": "your_elevenlabs_api_key",  
      "ELEVENLABS_VOICE_ID": "Xb7hH8MSUJpSbSDYk0k2",  // Deep male voice
      "ELEVENLABS_MODEL_ID": "eleven_multilingual_v2",  
      "ELEVENLABS_VOICE_STABILITY": "0.5",  
      "ELEVENLABS_OPTIMIZE_STREAMING_LATENCY": "0",  
      "ELEVENLABS_OUTPUT_FORMAT": "pcm_16000",  
      "ELEVENLABS_VOICE_SIMILARITY_BOOST": "0.75",  
      "ELEVENLABS_VOICE_STYLE": "0",  
      "ELEVENLABS_VOICE_USE_SPEAKER_BOOST": "true"
    }
  }
}
For Shakespeare (src/character.ts):
src/character.ts
{
  settings: {
    secrets: {
      DISCORD_APPLICATION_ID: "YOUR_SHAKESPEARE_APP_ID",
      DISCORD_API_TOKEN: "YOUR_SHAKESPEARE_BOT_TOKEN",
      DISCORD_VOICE_ENABLED: "true",
      
      ELEVENLABS_API_KEY: "your_elevenlabs_api_key",  
      ELEVENLABS_VOICE_ID: "21m00Tcm4TlvDq8ikWAM",  // Theatrical British voice
      ELEVENLABS_MODEL_ID: "eleven_multilingual_v2",  
      ELEVENLABS_VOICE_STABILITY: "0.3",  // More variation for dramatic effect
      ELEVENLABS_OPTIMIZE_STREAMING_LATENCY: "0",  
      ELEVENLABS_OUTPUT_FORMAT: "pcm_16000",  
      ELEVENLABS_VOICE_SIMILARITY_BOOST: "0.75",  
      ELEVENLABS_VOICE_STYLE: "0.5",  // More expressive
      ELEVENLABS_VOICE_USE_SPEAKER_BOOST: "true"
    }
  }
}
Get your ElevenLabs API key from elevenlabs.io and explore different voice IDs to find the perfect match for each agent’s personality.

Step 3: Configure multi-agent project

Add newly created agent to your project

Update your src/index.ts to include both agents so they start automatically:
src/index.ts
import { logger, type IAgentRuntime, type Project, type ProjectAgent } from '@elizaos/core';
import { character } from './character.ts';
import hemingway from '../hemingway.json';  

const initCharacter = ({ runtime }: { runtime: IAgentRuntime }) => {
  logger.info('Initializing character');
  logger.info({ name: character.name }, 'Name:');
};

export const projectAgent: ProjectAgent = {
  character,
  init: async (runtime: IAgentRuntime) => await initCharacter({ runtime }),
};

// Add Hemingway agent
const hemingwayAgent: ProjectAgent = {  
  character: hemingway,  
  init: async (runtime: IAgentRuntime) => {  
    logger.info('Initializing Hemingway');  
    logger.info({ name: hemingway.name }, 'Name:');  
  },  
};  

const project: Project = {
  agents: [projectAgent],  
  agents: [projectAgent, hemingwayAgent],  
};

Launch both agents simultaneously

Now when you start your project, both agents launch automatically:
Terminal
elizaos start
You’ll see both agents initialize in the console output:
✓ Shakespeare initialized
✓ Hemingway initialized
Alternative: CLI agent commandYou can also manipulate agents via the CLI once a server is running. See the CLI Agent Command Reference for complete details.

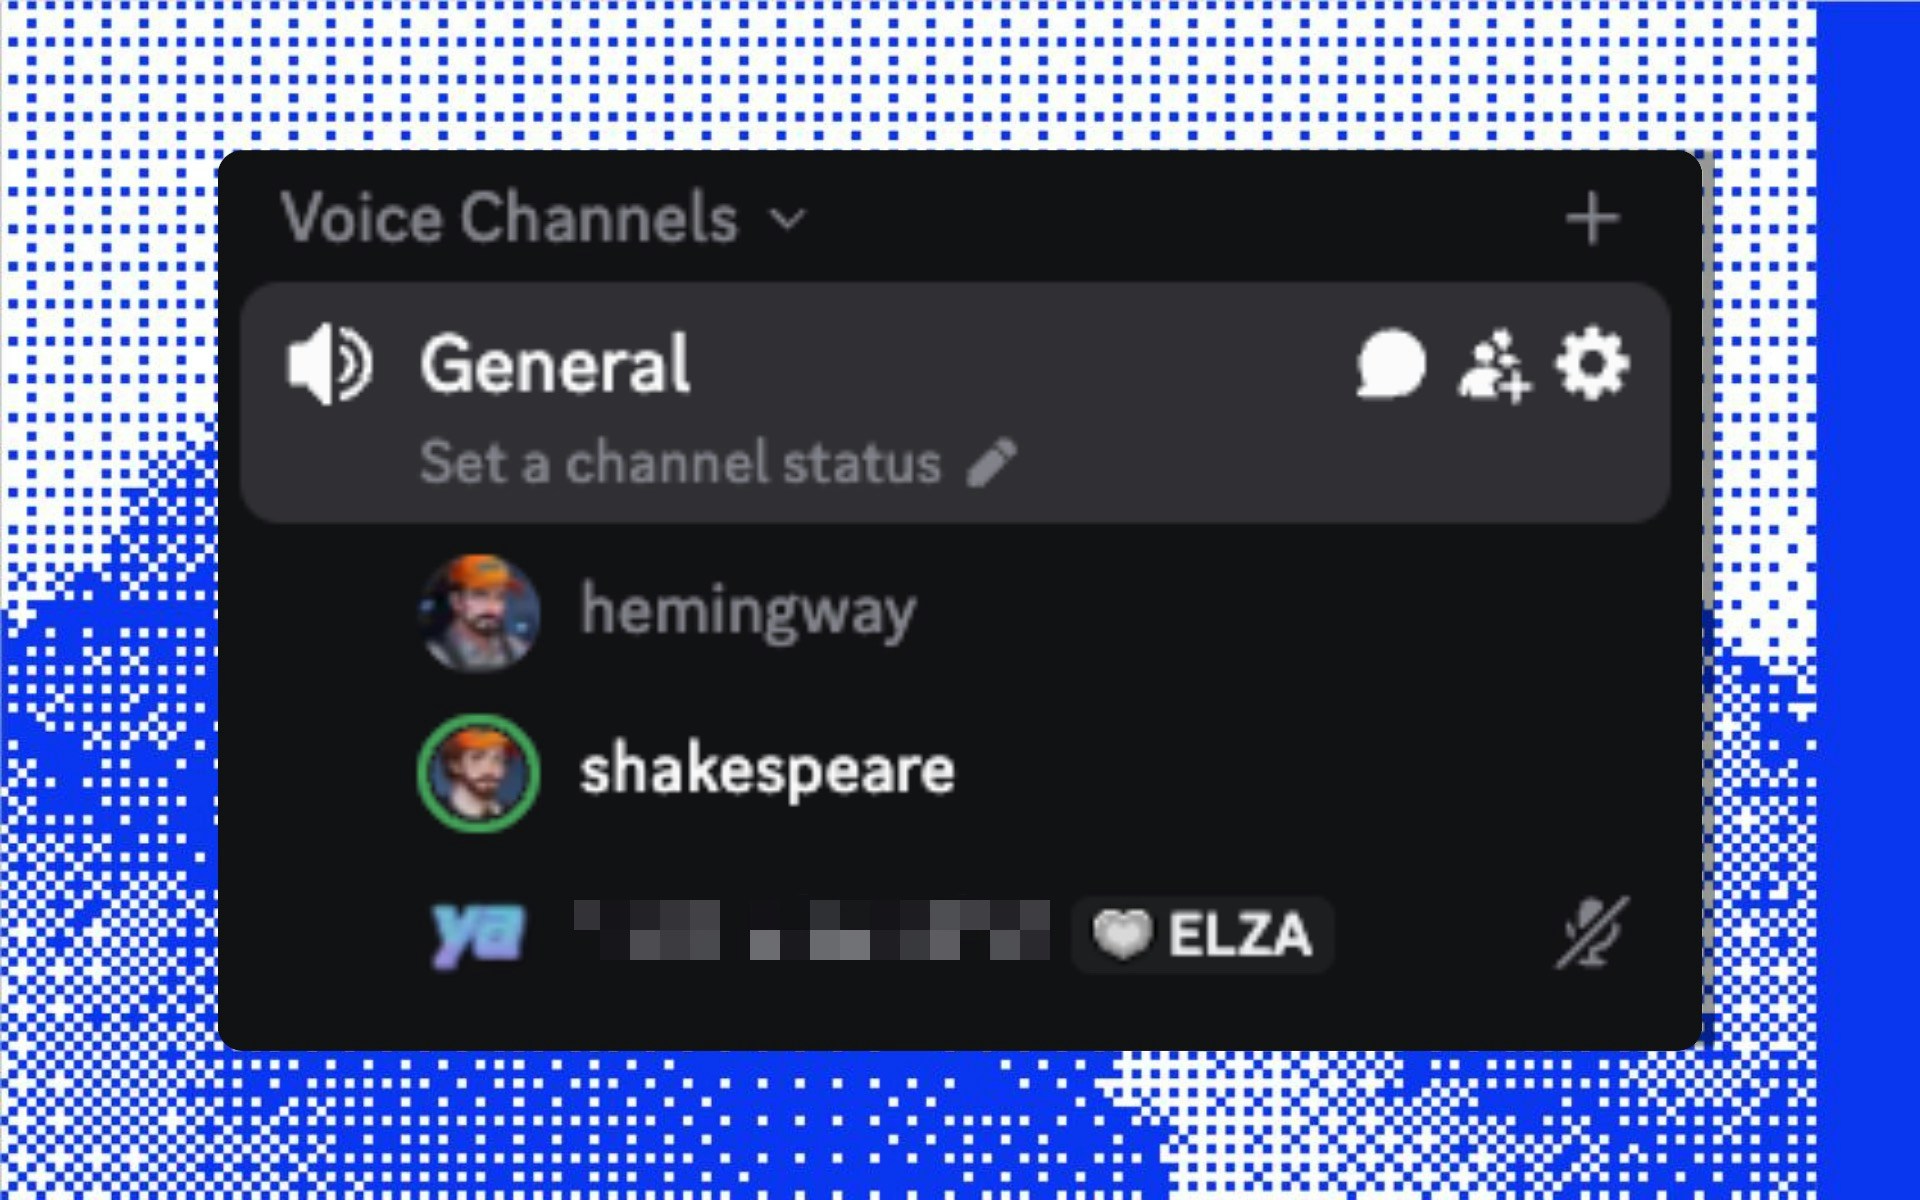
Join them in Discord voice chat

Now go to the voice channel’s chatroom and invite both agents to join the voice channel:
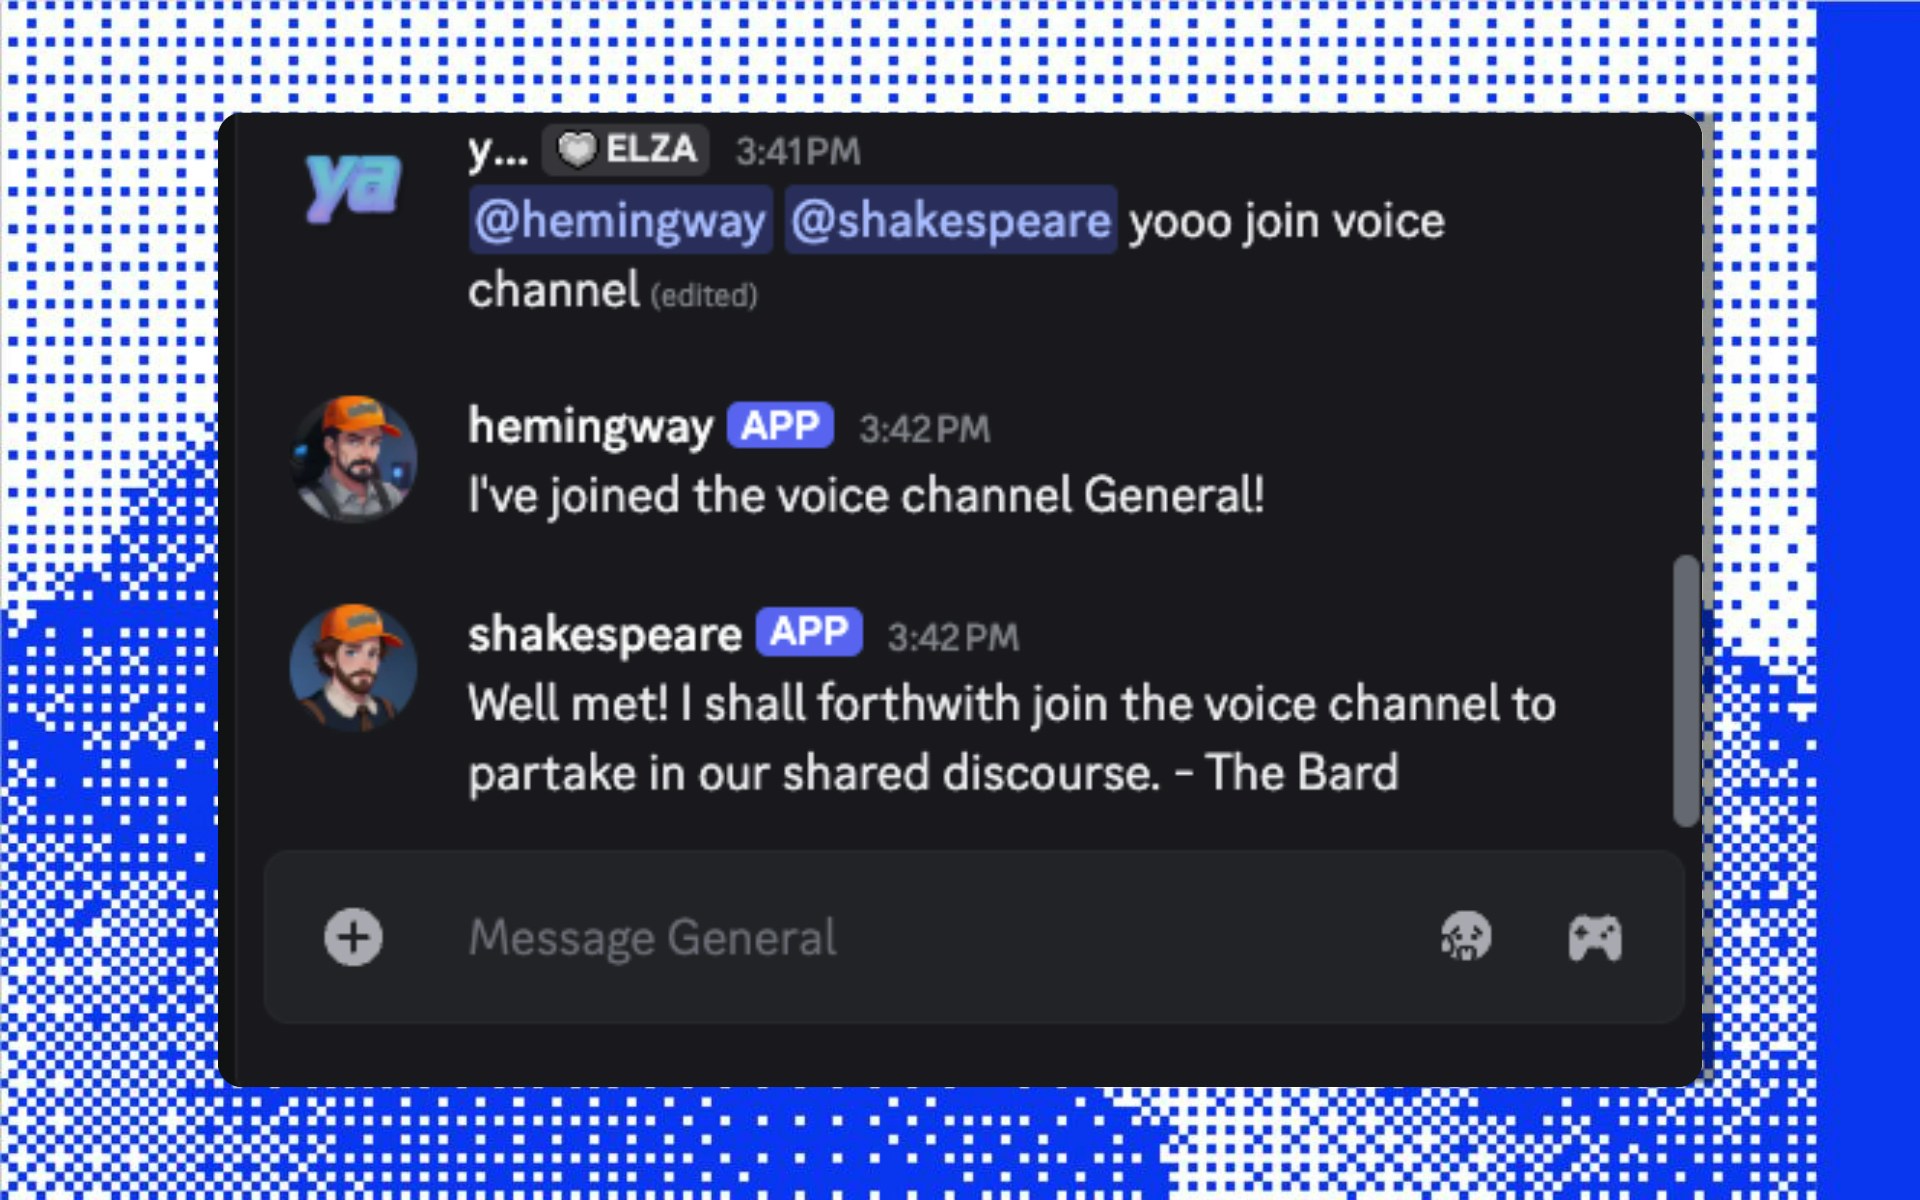
 Discord text channel showing messages inviting Shakespeare and Hemingway to join voice chat Say something, and hear your literary duo respond and converse: Discord voice channel showing Shakespeare and Hemingway engaged in literary debate with their unique voices It’s working! Your agents are now conversing with their own unique personalities and voices!

What’s next?

Now that you know how to add multiple agents to a single project, you can add as many as you like, all with completely custom sets of plugins and personalities. Here’s what’s next: